The “Lofi Girl” phenomenon didn’t just create a genre. It created a business model. It offers the dream for content creators: passive income, community building, and a brand that never sleeps. However, the reality is a bit different than the dream: Running a 24/7 stream used to be a pain.
Until recently, a non-stop broadcast meant dedicating a high-end PC to run OBS Studio for weeks. You risked hardware burnout, high electricity bills, and the constant fear of a Windows update restarting your computer at 3 AM. Not to mention the dropped frames, stuttering and a whole bouquet of audio-video sync problems.
Not anymore! Starting a 24/7 LoFi radio station is different and way simpler now. This guide moves beyond the tempting “Hard Way” (OBS + VPS) and details the “Easy Way” (Cloud Streaming). This lets you launch a professional station in minutes without leaving your browser or computer on.
Step 1: Pick Your LoFi Radio Station Niche
The “Study Beats” market is crowded. If you launch a generic channel today, you are fighting for attention in a big arena. Success in 2026 requires a narrower focus.
Instead of broad “Chill Lofi,” look for specific niches. Think “Synthwave for Night Driving,” “Dark Ambient for Coding,” or “Cottagecore Folk for Reading.” By targeting a specific activity, you build a loyal tribe rather than getting viewers who leave after one song. Since livestreaming is about community as much as it is about content, narrowing down into a specific niche simply gives people a better opportunity to connect with likeminded watch-buddies.
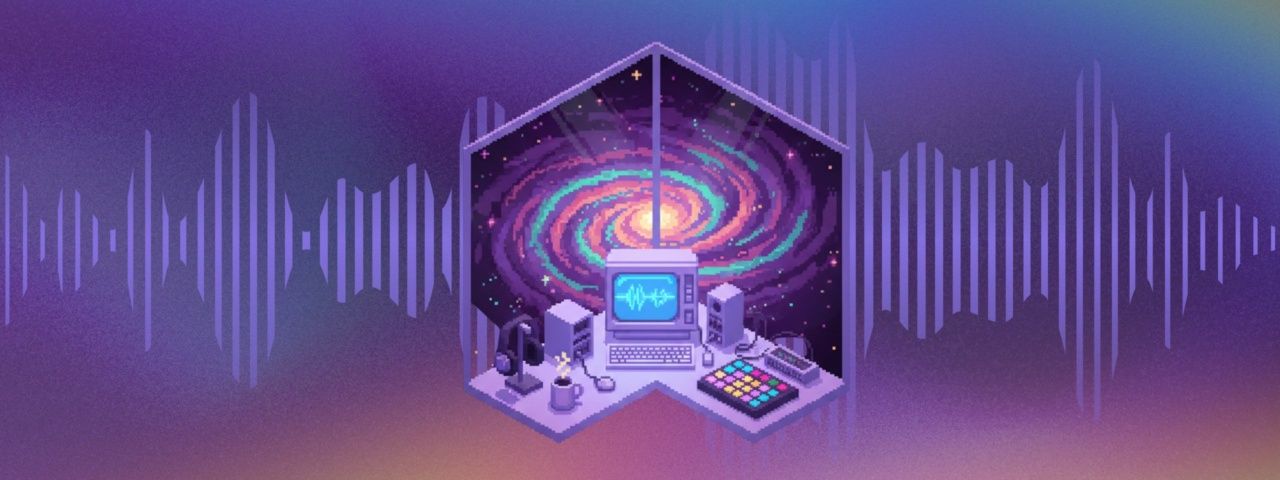
The Visuals
Your visual identity is just as important as the audio. The visuals are the most memorable part of your station, so you really need to make them pop.
- Pixel Art: Evocative and nostalgic.
- Cinematography: High-quality loops of rain on windows, coffee shops, or nature.
- 3D Animation: Custom loops that create a specific atmosphere.
Pro Tip: Your branding must be consistent. Your stream overlay, YouTube thumbnail, and channel banner should all use the same colors and fonts. Viewers should recognise your station from a thumbnail alone.
Step 2: Get Safe Music and Visuals
This is where most people get stuck. You cannot simply open Spotify, capture the audio, and stream it to YouTube. The Content ID system will flag your stream, block it worldwide, or issue a copyright strike. Three strikes and your channel is gone.
Understanding Rights
To stream music legally, you generally need two types of licenses:
- Master Rights: The right to use the specific sound recording (owned by the label or artist).
- Sync (Synchronization) Rights: The right to sync that music to video (owned by the songwriter or publisher).
This is not something to take lightly. Only use music that you have 100% rights to. Every other “edge case” is likely to lead to hurting your YouTube Channel badly. Check out our guide for copyright claims vs. strikes for creators.
Where to Find Safe Music
- Direct Permission: Reach out to independent artists on SoundCloud or Bandcamp. Many are happy to be featured if you give them credit. Post on r/LoFiHipHip or similar reddits with call for artists.
- Royalty-Free Libraries: Services like Epidemic Sound or Artlist offer “whitelist” features. You pay a monthly fee to use their catalog without strikes.
- Lofi Labels: Labels like Lofi Records often have specific submission forms for streamers. Always read the fine print.
Step 3: The Setup (Hard Way vs. Cloud Way)
This used to be the hard part. Let’s look at why the old method discouraged so many creators, and how things have improved.
The “Hard Way” (OBS + VPS)
To avoid burning out their home PC, creators usually would rent a Virtual Private Server (VPS) at a hosting company. You had to:
- Pay for a remote Windows server.
- Remote desktop into that server.
- Install OBS Studio.
- Configure complex audio drivers.
- Hope the server didn’t crash or lag.
It was expensive, technical, and broke often. The problem was mainly in the fact that running video 100% of the time is way harder than running a website with a few images and text, so these VPS computers were on the expensive side, and still are a ton of work to begin with and maintain.
The “Easy Way” (Upstream)
The current standard is cloud-based live streaming software. Platforms like Upstream manage the infrastructure for you. You upload your files to our servers, and we broadcast the feed to YouTube or Twitch directly.
The Benefits:
- Save Your Hardware: Your personal computer is off. The cloud handles the work.
- Stability: Dedicated streaming servers are built for 24/7 uptime. Standard Windows VPS setups are not. We have backups, and backups of backups, that you will probably never know about, ensuring that 99.9% uptime.
- Zero Maintenance: No driver updates or bitrate tweaking required. We take care of that, constantly and forever.
- Cost: This is usually cheaper than renting/running your VPS
- Ease of mind: Nothing beats a set-it-and-forget-it service. You can finally relax.
Step 4: 24/7 Lofi Stream Setup Tutorial
If you have your content ready, you can go live in under 20 minutes. Here is the workflow using Upstream’s cloud infrastructure.
1. Create Your Account
Head to Upstream and sign up. There is a free trial available that doesn’t require a credit card. This is ideal for testing your stream stability before committing.
2. Connect Your Platforms
Click on “Create new stream” and choose to Connect with YouTube (easiest). You can connect your YouTube channel via API integration with a few clicks. This grants Upstream permission to send video data to your channel, but not much else – so you are safe! (We are YouTube Verified by the way, so you can be sure your stream is in good hands) Additionally, you can connect Twitch or Kick or any other platform if you plan to multistream. Check out our list of 15 best platforms to stream to here.
3. Upload Your Content to your Playlist
Upload your media files directly to the Upstream cloud drive. You will need your visuals (video or static image files) and your audio tracks (MP3 or WAV). Set up your playlist however you’d like, there are a ton of features to help you.
4. Go Live
Once your playlist is built (more on that below), you simply hit “Start Streaming.” Upstream’s servers take over. You can now close your browser, shut down your laptop and go about your day. Your station is on air!
Step 5: The Radio Playlist (Audio & Video Separation)
Most editing software forces you to “bake” your audio into your video. If you wanted a 10-hour stream loop, you had to render a massive 10-hour video file. If you wanted to change one song, you had to re-render the whole thing. Which is horrible.
Upstream solves this with independent Audio and Video playlists.
How It Works
You upload background images (jpg / png) or video (mp4) loops. Your playlist is set to “loop infinitely” by default. Then, you add files to a separate audio playlist with your songs and set it to “shuffle.”
The system mixes them in real-time in the cloud. Each time creating a unique combination. Cool, right?
Why this matters:
- Change Things Up: You can delete a disliked song or add a new release to the playlist while the stream is live. No need to stop the broadcast.
- Save Space: You aren’t storing massive video files. Just small audio files and one short video loop.
Step 6: Enrich the Radio Stream
A static image and som beats isn’t always enough. Viewers expect a TV channel experience.
Using Upstream’s Drag-and-Drop Stream Designer, you can layer elements on top of your video loop without needing Photoshop or coding skills.
- Now Playing Widget: This is essential. Viewers want to know the song name. Upstream pulls the metadata or filename from your audio file and displays it automatically.
- Tickers and Socials: Add a scrolling text bar at the bottom. Thank recent subscribers or show your Instagram handle.
- Atmospheric Sounds: You can add a secondary audio track for atmosphere. Layer rain sounds or vinyl crackle over your music playlist for that authentic Lofi texture. This channel plays seamlessly, so make sure your files are seamless audio files that are loopable without clicks or breaks.
- Embed Interactive Elements: You can embed widgets like StreamElements: Sub Counts, Live Sub Notifications or anything else you come up with. If you are not familiar with these, make sure to check it out! Subs LOVE seeing their name pop up on the big screen when they sub or donate.
Step 7: Growth Strategy
Don’t rely on one platform. Algorithms change and accounts get flagged. And besides, with Upstream, multistreaming is free – you get 10 destinations, at no additional charge, included with every stream slot in your plan.
Be Everywhere
The most effective way to grow is to be everywhere at once. Upstream allows for multistreaming to up to 10 platforms at the same time. You can push your signal to YouTube, Twitch, Kick, and Facebook Live simultaneously without using any extra bandwidth from your home internet.
Don’t Forget Mobile
Do not ignore the vertical screen. YouTube Shorts and TikTok Live are currently the biggest drivers of discovery. Upstream offers Vertical Stream Support, allowing you to reformat your stream for mobile devices. YouTube has recently also enabled horizontal streams to automatically get pushed to vertical, too!
Running a vertical stream alongside your main horizontal stream captures the “scrolling” audience. These are people who stumble upon your live feed while swiping through their phones. Yes, these audiences are different, but for sure there is a big overlap between the two, and it’s that overlap that you should be going for.
Step 8: Make Money with LoFi
Passion projects are fun but it’s the businesses that pay the rent.
- Ad Cue Points: YouTube allows mid-roll ads on live streams. Upstream gives you control over when these happen. You can set cue points to trigger ads between songs. This ensures the music is never interrupted abruptly, and theres way more chance that the viewer will come back to your stream.
- Donations: Integrate StreamElements or similar tools to display donation alerts on-screen. A simple “Shoutout to RoboBoy777 for the coffee!” alert encourages community support.
- Sponsorships: Once you have viewership, you can use the overlay designer to place small sponsor logos or banners directly onto the stream layout.
Making money streaming requires you to look at your operation as a business. Check out more on making money streaming.
Summary
The hard part of running a radio station is gone. You don’t need a tech degree, a $2,000 PC, or a complex server contract. You just need good taste in music and a few good ideas.
By choosing cloud streaming, you remove the technical friction and focus entirely on the music and the community.
Ready to start your station today without buying a new PC? Sign up for Upstream’s free trial and launch your 24/7 stream in the next 15 minutes.